
 Hrvatski (Hrvatska)
 Creating blank_template in InDesign
Step 1 - Create the InDesign template
Indesign/StoryLink
In the process of layouting the StoryEditor relies entirely and completely to Adobe, that is why the layout can be done only in InDesign. If you don’t use Indesign in your workflow our company will gladly help, since we also train users to work in Adobe programs, in addition to implementing our system.
Create the template
Let us assume that the publication is already being published, that it has its own defined layout (format, margins, columns...) together with defined paragraph, character and object styles (if they are not correctly defined, this is an opportunity to go through them and sort them out :)), sections, constant elements...
Open the InDesign document with all of the basic elements (paginations, sections, paragraphs /see Create paragraph styles in Create new publication section/, characters and object styles), then open the structure of the page (View -> Structure -> Show Structure) and clear all of the elements and tags except the Root. If you don’t do it - and so far you’ve been working on some other system (e.g. DTI) that uses the tagging of the elements - you will have problems with the system being slow. It is also very important to remove additional tags from all the other elements that you are using already.
After clearing, save the document naming it blank_template to the folder that contains publication on the server
\\....\press\composition\ROOT\MAGAZINE\templates\default_template
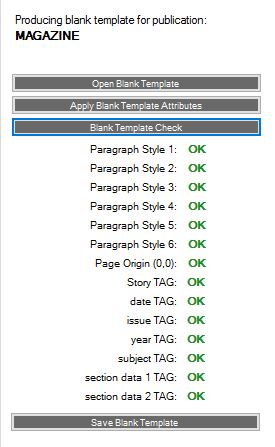
After that, close it and open it through StoryLink (StoryLink -> Press -> Publication (select the name of the publication) -> Options -> Blank Template -> Open Blank Template. At the opening define the parameters through Apply Blank Template Attributes that builds the basic paragraph styles and tags into the blank_template. Blank Template Check indicates whether the parameters are merged with the document.
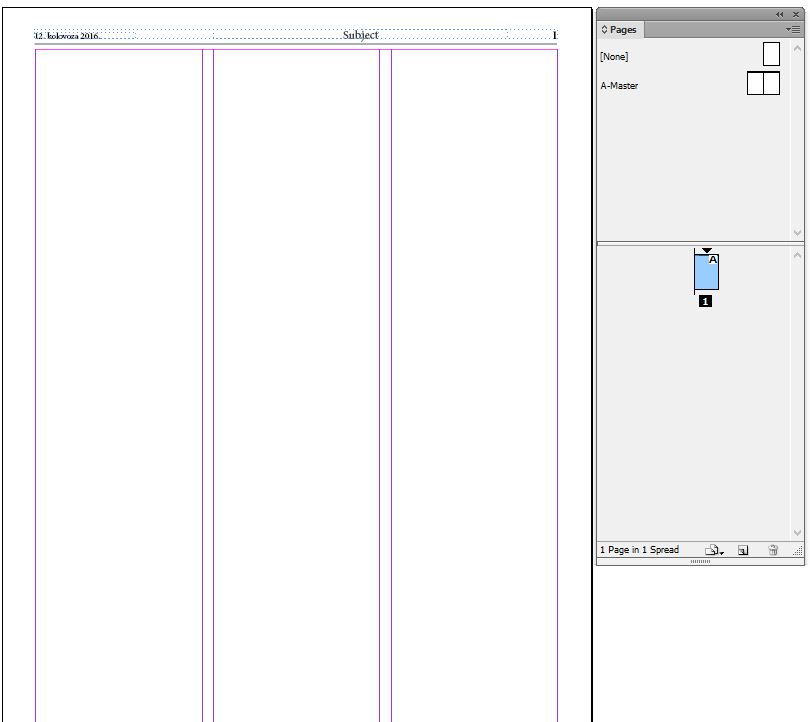
Now in the document on the master (menu Window -> Pages) select the master A, making it the basic master if there are more of them, additionally you can add more master pages (pages for ads, first page, inset...).
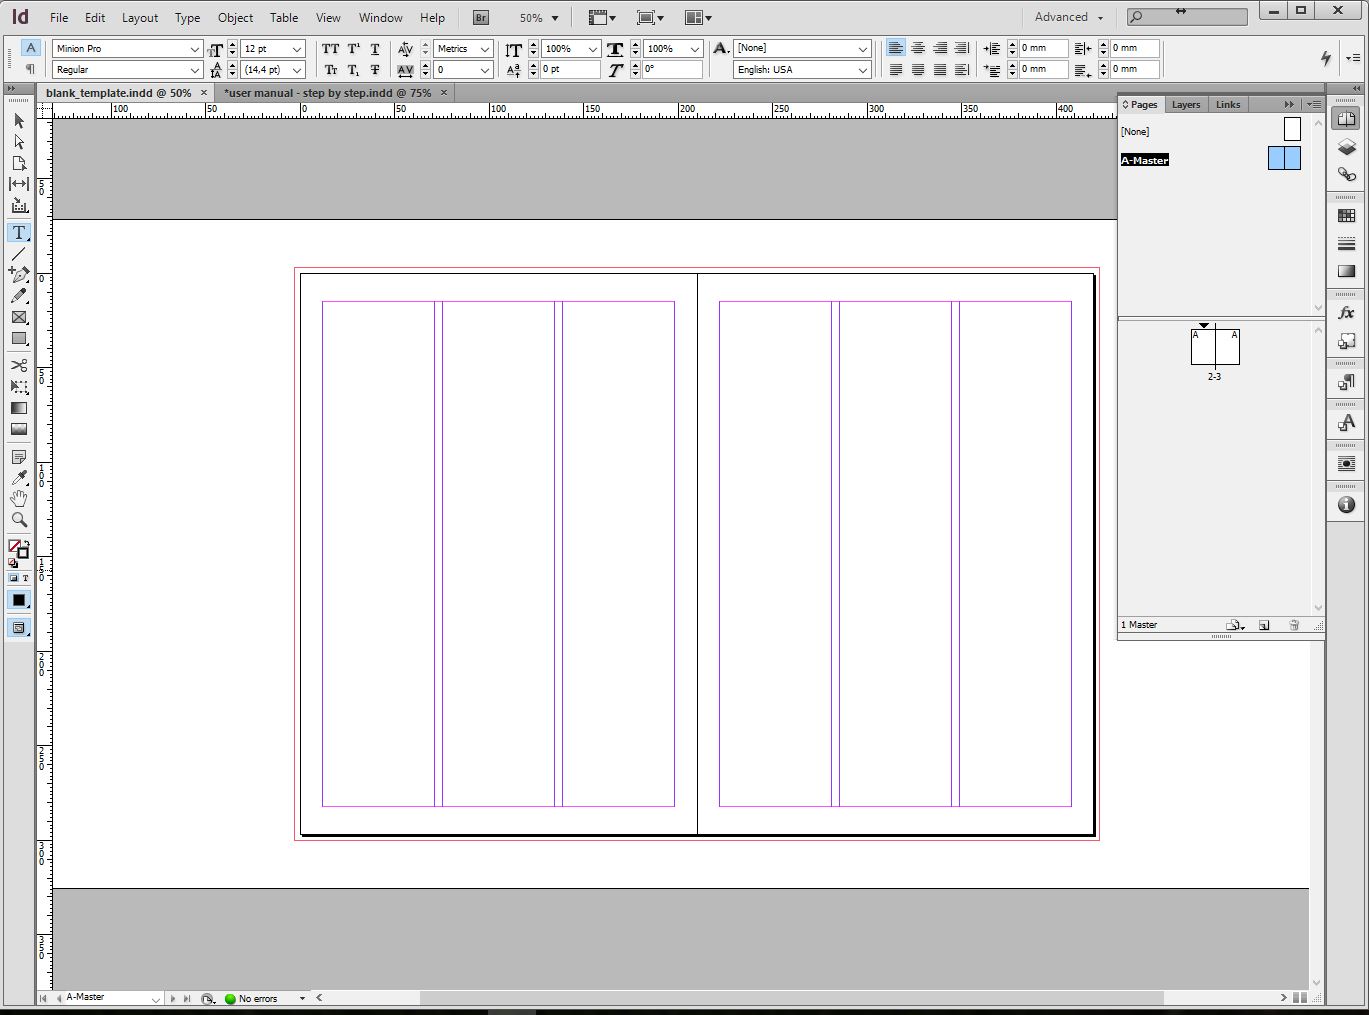
Insert the basic elements of the page - pagination, section, letterhead with the name of the publication and date, lines or additional elements that you use etc. into this master.
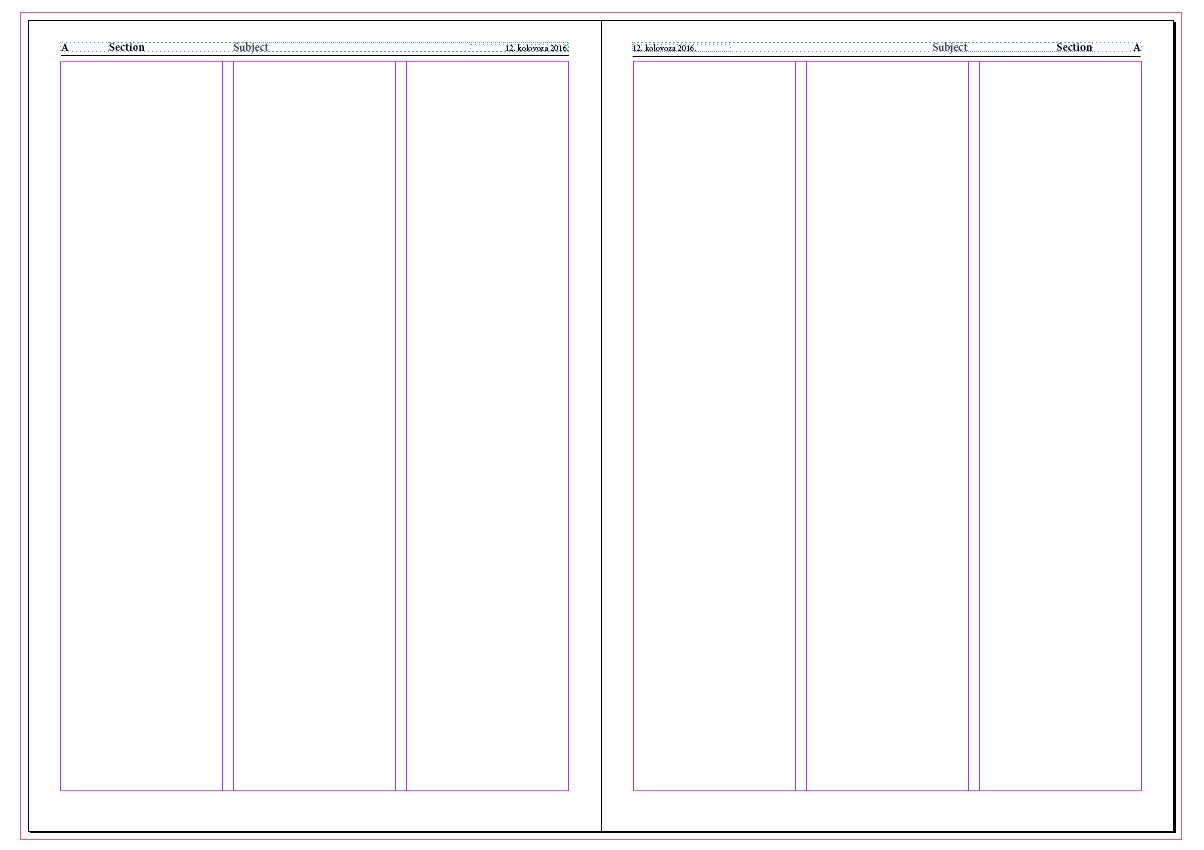
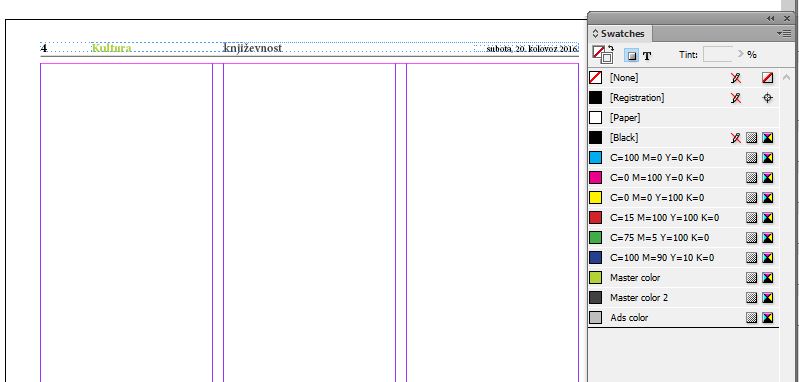
A page number (pagination)
Section - section (that is automatically shown when opening the page in a certain section). If sections have separate Master and Master 2 color (see: Create new publication, Step 7 - Modify the sections within the publication), assign Master or Master 2 color to this element.
For StoryLink to be able to automatically show the section (section), the frame must be correctly ‘marked (labeled)’ . Select the text, mark it through the option Type -> Insert Special Character -> Markers -> Section Marker.
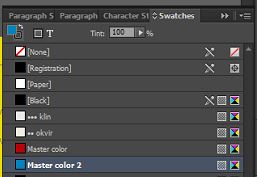
Subject - subsection - that is automatically shown if the section is assigned with the subsection (see: SE Modules - Press - Subject). This element can also be marked in the Master color and is linked to StoryLink through the tag. This time select the frame and then in the menu Tags (Window -> Utilities -> Tags) select the marker subject
Date - date of publishing - is automatically connected to the edition that we are working on. You need to correctly tag it, like subsection, through Tags menu (Window -> Utilities -> Tags) tag date
To make sure the frames are correctly tagged, see View -> Structure -> Show Tagged Frames.

If all of the elements are correctly marked, use the existing A master to make copies of all other masters (e.g. master for the front page that doesn’t have columns and pagination, master for the ad that doesn’t have columns...).
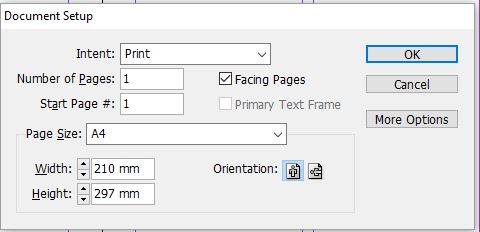
After creating the master check whether the paragraph, character and object styles are correct, then leave just the first, basic page in the blank template. It doesn’t matter that there is only one odd page, because when creating the document StoryLink will add pages, paginations and other elements to the even page (File -> Document Setup)
In the end, it is important to check the document (BT Check) and save it through StoryLink option Save Blank Template.
The best way to check the template is to use it to create the test edition.
Step 2 - Create the elements for layouting
StoryLink -> Options -> Labels -> Type /Indesign
StoryLink connects the articles and their elements created in StoryEditor with the frames provided for the articles in InDesign. To make sure the connecting is successful, the elements must be correctly labeled.
In order to work faster and more efficiently, you need to carefully prepare all the layout elements, label them correctly and save them to the library.
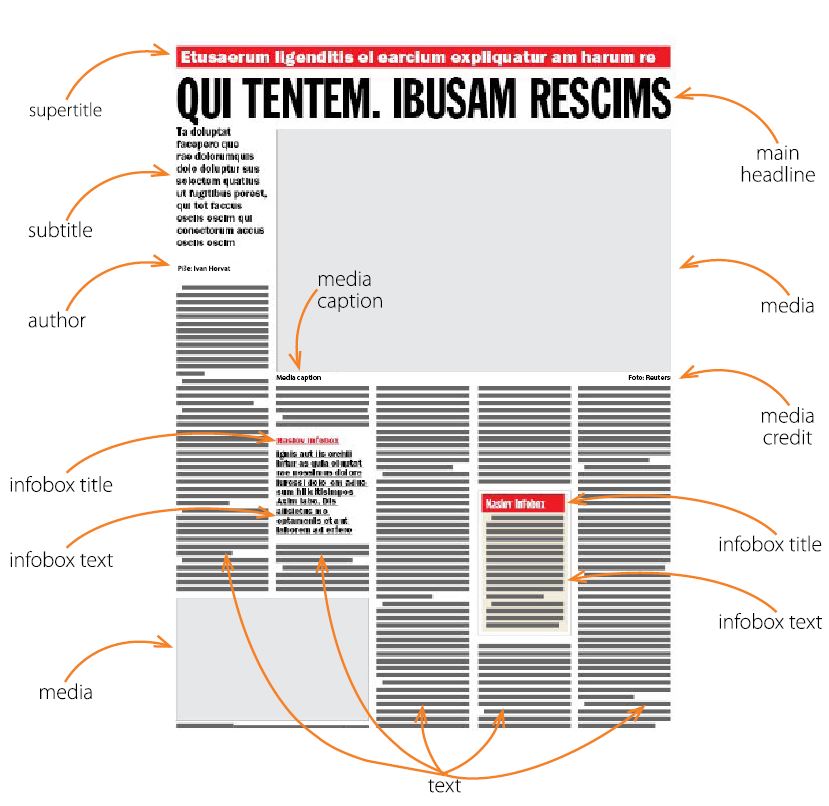
First of all, prepare in InDesign the most frequently used elements - frames for articles by columns, frames for the caption of the author, photos, infoboxes, leads, quotes... fill them with a generic text* (lorem ipsum) and assign to them the correct paragraph styles, and then label them.
* it is extremely important to completely fill all the text frames, so the system could have the right amount of text characters when you create the articles from the prepared elements.
When labeling, it is important to label all the needed elements (e.g. it the text spans through three columns, you need to label all three columns as text. Otherwise, the system will recognize only one column, and at creating the texts it will consider only the amount of characters from that frame).
Remark - elements must not be grouped because the system will not be able to read them off when connecting with the texts
Step 3 - Create the library
StoryLink -> Options -> Labels -> Type /Indesign
Save the prepared elements to a library and then save it to the system.
Libraries
Considering that all the elements in InDesign have to be correctly labeled, using the libraries with already prepared elements makes the work much easier and faster. Thus using the libraries is much more extensive than usual.
After creating library in InDesign using all the elements, save it to the database (...\press\composition\ROOT\MAGAZINE\libraries) and then enter to the database - type into the library menu the exact name of the .indl document - see picture below

Library Groups - the group of libraries (e.g. Magazine)
Library - library (e.g. the articles)
You can open/close a single library or all from the group using StoryLink, they will open in InDesign
The library doesn’t have to contain single elements, you can also save the whole pages, preparing them the same way you did with single elements.
Step 4 - Create the test edition
StoryEditor -> Press -> Project Management -> Manage Projects -> New Project
Project General data - general information
Project name - name of project (e.g. Special), it’s not necessary to enter the date because the system does it automatically
Publication name - name of publication (e.g. MAGAZINE)
Publish date - date of publishing
Issue number - number (e.g. 2) - Display as the way the number will be printed in the publication (tag issue) 02
Mutation version - mutation version
PDF OUTPUT Name Convention - name of PDF document ready for press, if nothing is typed here, the convention listed will be used when creating a publication (SE -> Admin -> Admin Publication -> Publications -> PDFs Configuration)
Issue number - format defining the way issue number will be displayed (e.g. 2 or 02 or II...)
Deadline - deadline for delivery to press - 22:00 (HH:MM)
Project DATA 1 - non-standard tag that can be printed on the InDesign page (text object on the page defined with tag project-data1)
Data1 (project-data1 TAG) non-standard tag that can be printed on InDesign page (text object on page defined with tag project-data1)
Project DATA 2 - non-standard tag that can be printed on InDesign page (text object on page defined with tag project-data2)
Data2 (project-data2 TAG) non-standard tag that can be used for printed on InDesign page (text object on page defined with tag project-data2)
Description - project description
Project Data - project data
ID - ordinal number of edition (created automatically)
Language - language defined when creating publication
Project Name - project name that was previously entered
Year - year of projects publishing -
Display as - way to display year of projects publishing (what it will look like on the page, within the object tagged as year)
Year Format - select the year format to be used (e.g. 1, 01 or I)
Total number of pages - total number of pages in the project
Page number format - how page number will be shown in InDesign document
Date on page - date of edition shown on page
Date on page format - way of displaying date on page
Date format to lower - formating date to lower-case
Capitalize all words - formating date to capitalized
Capitalize first word - first word capitalized
Remove leading zeros - this option is turned on if you don’t want to display date starting with 0 (e.g. 08. 01. 2016.)
Custom date - occasionally there is a need for displaying dates in a special way that is not provided by the system (e.g. friday 30. June and saturday 1. July 2099.), this is when you will use this option
Sample date - shows the date that will be shown on the page (after saving) friday 30th of June and saturday 1st of July 2099.
Step 5 - Assign the sections and subsections, create the multi-page documents
StoryEditor -> Press -> Table preview/Indesign/StoryLink
Page section - section to which the page belongs to can easily be changed through a drop-down menu (1); use the Spread Section menu to easily spread it to a certain section on several consecutive pages (2).
Subject - displays additional subsections - e.g. the section can be culture, but under the subject can be written literature, that way the graphic designer can easily notice which subsection goes to which page. When you enter the subject on the first page of the section, it will be (after confirming) repeated on all the following pages.
Multi Set - Multi set option enables to merge two or more pages of same section. Note that when merging, first page is the leading InDesign document that carries all other pages over. If other pages, before merging, already have some content, you have to manually copy that to later merged pages.
Step 6 - Check the template
StoryLink -> Press -> Publication -> Project/Indesign
Open the publication and the project through StoryLink, mark the page you want to open, then click on open and wait a while for page to fully load - you will see how the system ‘arranges’ it. .
If everything is OK, the pagination, the section (along with the master color), subsection (along with the master 2 color) and date will automatically be defined, and the document will contain all the paragraph, character and object styles from the template.