
 Hrvatski (Hrvatska)
 Creating styles and tagging in InDesign
First, import XML to InDesign as described in the "Export and Import classifieds XML into InDesign" section.
Creating styles in InDesign
By inserting XML in the structure of InDesign, the tags that we have defined in StoryEditor are created when creating classified formats.
Double-clicking on a particular tag in the structure (underlined) is marked on the page (selected on page).
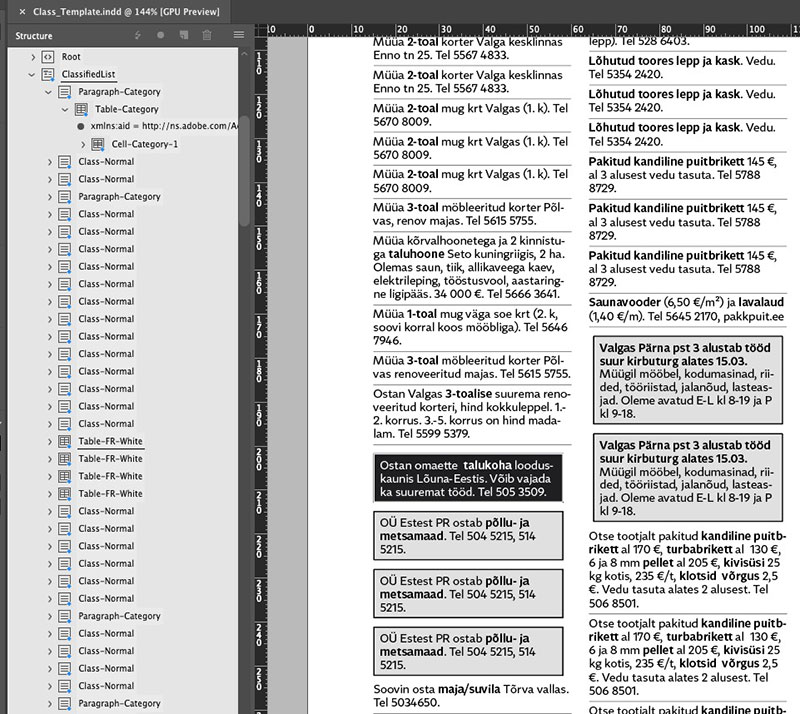
Some tags are automatically defined through StoryEditor, such as tag for classified Category. (Paragraph-Category, Table-Category, Cell-Category and Category.)
| Paragraph-Category |
Categories are in tables and cells so it is necessary to define the styles and for the paragraph and the table and the cells. And this paragraph style that carries a category table, we must check that here we dont have some insets or something. |
| Table-Category |
2x click on a tag to mark a table that we can format and then create Table Style. Here, we usually define the space before and after the table. |
| Cell-Category-1 | Each table must also contain a cell where we can define InDesign Cell Insets, Vertical Justification, Strokes and Fills, after which we create Cell Style. Depending on the category design, we sometimes use Strokes and fills and it sometimes has to be addressed through paragraph styles through the Category-1 tag. |
| Category-1 | Level 1 (parent category, if there are subcategories level increases to 2, 3 ...). For this tag we create paragraph style under the same name. |
If we want to use .eps files in inDesign instead of category styles, then each eps file must be called by the ID of these categories (Settings -> CATEGORY). All of these eps documents are stored on the server in folder: Composition -> ROOT -> "Publication name" -> classifieds -> categories.
When importing an XML file, instead of a category table, it will take eps file from that folder defined by ID of category.
We defined all other tags when creating small ad formats:

Explanations of other tags and how to create styles:
| Class-Normal | The tag that links style to a plain small ad, we do not have to create styles for this tag because we will link it to AD-Normal tag. |
| Img-FR-Center |
Each image should have its own tag so that it can position it in the middle using the paragraph style, and with automatic leading, image does not exceed the rest of the text. Likewise, with this paragraph style we define the space before and after the picture. |
| AD-Normal |
We create a new Paragraph style named AD-Normal according to the design. |
|
Table-FR-Yellow Table-FR-White |
Here are some of the tags we've created in the formats for the needs of small boxed or subscripted ads. As with any category, each such format must have 3 tags (Table - Cell - Paragraf). For Table tag we create table style in inDesign. In the table style, we can define which cell style the table usually contains (General -> Cell Styles -> Body Rows), and in the style of the cells are defined the paragraph styles (General -> Paragraph Styles) so we only need to map Table style with Table Tag. |
NOTE: When creating a paragraph styles, it's important to include the Keep Options -> Keep Lines Together -> All Lines in Paragraph option, as this will not divide the ads content by half in columns.
Map Tags to Styles
Once we have defined all the styles for our tags, we need to map them with tags in the XML structure. Clicking on the window structure menu and choose Map Tags to Styles.
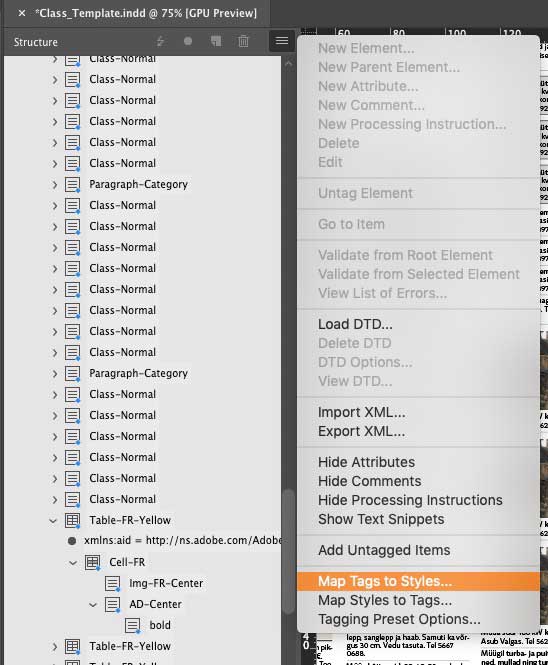
In the new window on the left side is the tag list from XML and on the ight of each tag we choose the InDesign style with which we want this tag to map.
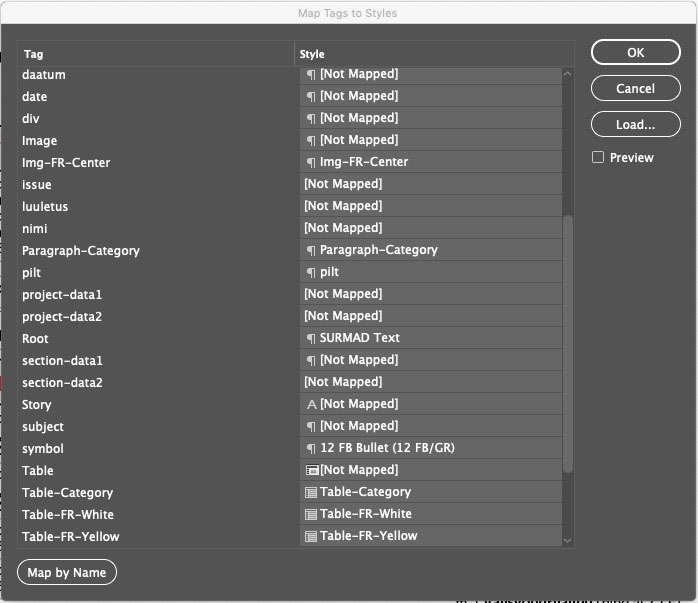
NOTE: It is important to note that now this InDesign document where we created styles and mapped them with tags becomes a Template for Classified pages.