
 Hrvatski (Hrvatska)
 Multiple Media Upload
Multiple Media Upload - opens the menu for uploading one or more photos from the local hard disk to the system.
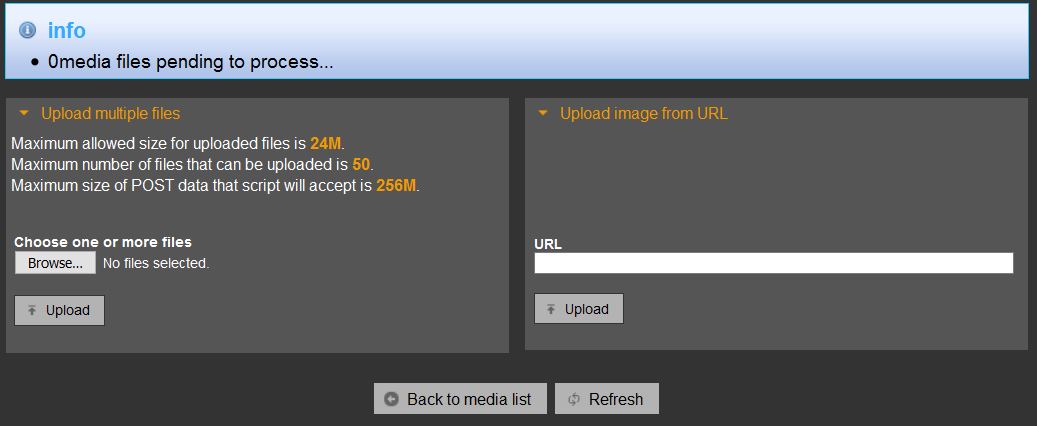
INFO
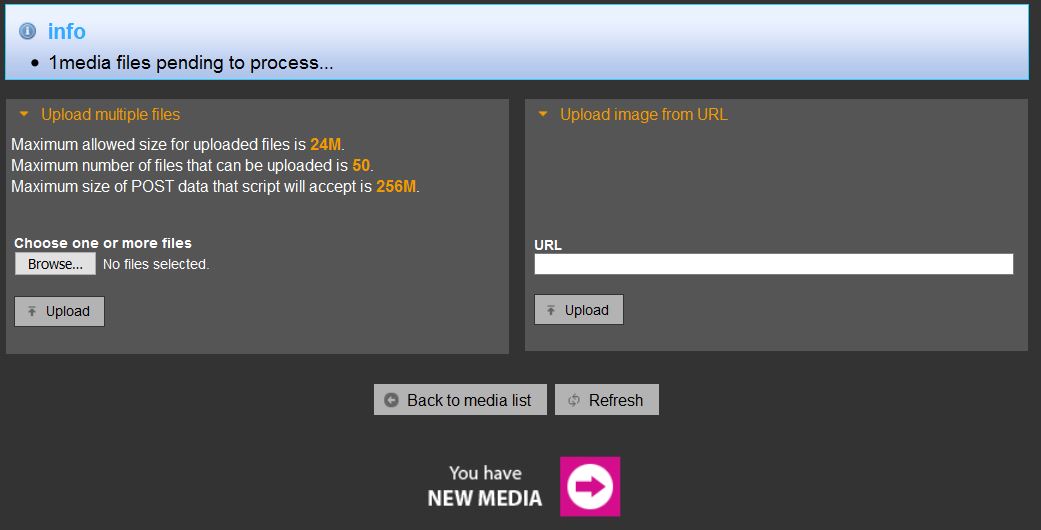
| 0 media files pending to process... | marks the number of photos in the process of uploading |
| Upload multiple files | when uploading files it is important to check given parameters; Maximum allowed size for uploaded files is xyM Maximum number of files that can be uploaded is xy Maximum size of POST data that script will accept is xyM |
| You can upload the photo either from the hard disk or the WEB location. |
| When you are uploading the photo, click the browse option to find folder with the photo, select the photo and click the Upload option. After a few moments at the bottom of the menu a notification will appear saying You have new media, as well as the icon leading you to the page with the photos you have just uploaded. At the same time, notification shows that there is 1 media file in the process. |
| When you are uploading from another web location you need to copy the URL of the photo and paste it to the URL field, then click Upload. |
| At the top of the page with uploaded photos there is a menu for working with those files. |
| Back to media list | returning to the list of photos |
| Refresh | refreshing the list |
| Delete all | deletes all of the photos in this procedure |
| Save IPTC for all | enables transferring the photo data to the photo’s IPTC metadata |
| Move all | transfers all of the photos together to the database |
| Move all to cart | automatically transfers all of the photos to the chosen cart |
| Connect all with job | connects the photos with a certain task in Jobs module |
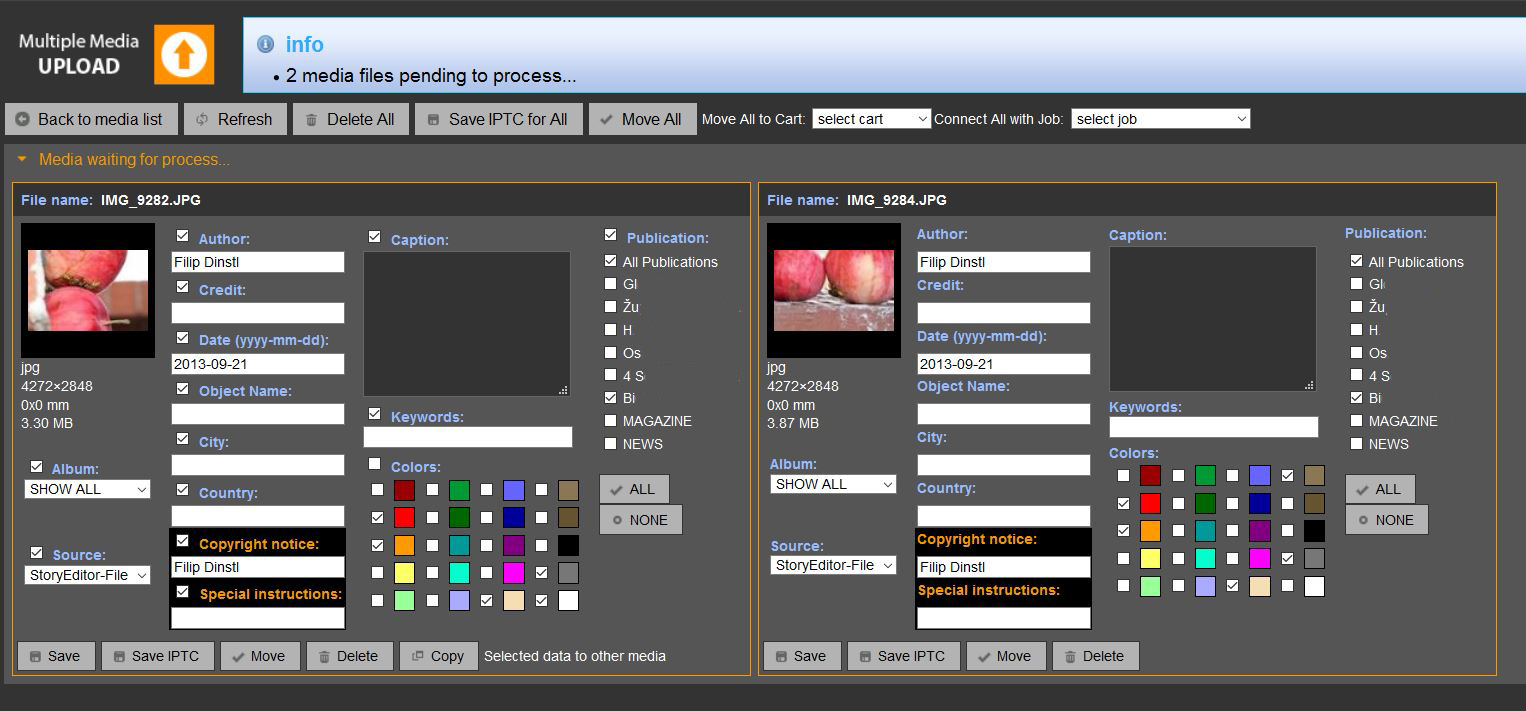
| Here we have to fill in the data and the details of the photo that will help searching through the system later on. |
| File name | shows original name of the photo |
| jpg | shows format of the photo |
| 4272×2848 | size in the pixels |
| 0x0 mm | size in millimeters |
| 3.30 MB | size of the document |
| Album | saving the photos to the albums created through the admin panel |
| Source | source of the photo uploaded to the system |
| Author | author of the photo |
| Credit | agency |
| Date (yyyy-mm-dd) | date when the photo was taken |
| Object Name | the group name (group name) for saving the multiple photos (e.g. object name: elections 2016). This kind of marking makes search easier later on |
| City | city |
| Country | country |
| Copyright notice | copyright on the photos taken from IPTC data |
| Special instructions | additional remarks for using the photo |
| Caption | this field is mandatory, write in at least two words none of which can be a number (e.g. jure jurić - yes; jure 2 - no) |
| Keywords | keywords for the easier search of the wanted photo |
| Colors | most prevalent colors in the photos are automatically detected by the system and are tagged for the easier search by color |
| Publication | publications (here we select the publication to which the photo belongs, and which users will be able to see it; e.g. the photo uploaded with the all publications label will be seen to all users (all of them will also be able to use it), but the photo uploaded to the Magazine will be seen only to the users of Magazine publication.) |
| Save | saving the photo’s data |
| Save IPCT | saving the data into the metadata of the photo |
| Move | moving to database |
| Delete | deleting the photo |
| Copy To |
Opens a window in which we define which fields we want to copy to the selected images. See more here STEP BY STEP - Media upload |
| Copy | copying the slected data on first image to other photos |
| The color of the photo’s frame indicates if all the data is correctly filled - the orange color indicates that something is wrong with the data (most likely there is only one word typed in the caption field), the white frame indicates that everything is correct. |